Showing posts with label 15mm. Show all posts

Monday 7 September 2015

EEF digs in - Battlefield Accessories' Hasty Entrenchments

Not a great deal of progress was made on miniatures this weekend - although a scratch-built Ottoman blinkgerat is on the painting table (second from left in picture below).  These were a signalling lamp powered by acetylene gas and that could be used when there was no sun.
However, I was able to finish off a set of 'hasty entrenchments' I'd purchased a while ago from Battlefield Accessories. These will provides my slowly expanding Egyptian Expeditionary Force (EEF) with some cover while they await the Turks!


Sunday 30 August 2015

Heliograph team, Egypt and Palestine c1915 - Eureka 15mm British in Sinai conversion

In the BEF signals were dealt with by the Royal Engineers:

In 1914 each infantry Division included a Signals Company with a total strength of 162 men. It was organised into a Company HQ and 4 Sections, of which No 1 Section was responsible for communications with Divisional HQ and Nos 2-4 with the Brigades of the Division.
Source: http://www.1914-1918.net/whatfieldcoy.htm

Among the equipment available to the signallers, was the heliograph which employed a mirror (often mounted on a tripod) that was used to 'flash' Morse Code.

You can see some original footage of a heliograph in action here:

The heliograph was valued for its mobility, being quick to set up. It was a cheap signalling system with an impressive communication range in the right terrain. A 5 inch reflector had a signalling distance of some 50 miles (80 km), whilst the 9 or 12 inch models had a range of up to 80 miles (130 km). Best of all, in the Middle East theatre, there was plenty of sun!

Signals posts play an important role in the command system of If the Lord Spares us (ITLSU) rules by increasing the distance over which Battalion COs can operate effectively from the Brigade Commander-in-Chief.

There are no signals figures among the Eureka 15mm range so some conversion was necessary to obtain some signal posts. I have always liked the iconic images of heliograph teams operating in Egypt and Palestine, so wanted to put together some for my British.
The figures that provided the best conversion opportunity were the British in Sinai Artillery Crew (300HBC84). Here's a few pictures of how I approached the conversion.
The tripod is made of brass wire with a thin section of PVC tube for the mirror frame (white) and a circle of foil for the mirror itself (added after painting). Each 'leg' of the tripod was about 12mm / 0.5 inch.
I made some holes for the tripod using a heated nail. This is a 30mm base (~ 1 1/4 ") and the holes are 6mm (1/4") apart.
The tripod legs are glued in place.
The heliograph operator is made from the Eureka artillery crewman holding a shell. With the shell cut out it leaves his hands in quite a good position - looking like they are operating the Morse key behind the mirror.
The crewman with the coincidence-type range finder is adapted to a signaller holding binoculars. Most heliograph pictures show the spotter using a telescope - in this case I use some poetic license for convenience. It would be possible to scratch build a nice telescope on a tripod and cut away the second binocular lens.


The standing signaller has his base trimmed so the front foot will fit between the tripod legs.
Then, the signallers are ready to go!
For the first team I mounted the upright mirror frame strait on the apex of the tripod which was fiddly. This time I mounted a second piece of tube over the end as a base for the upright mirror. The made it easier, to mount the mirror frame but had the effect of raising the height of the heliograph a little. 
The mirror 'frame' is then glued in place.
The crew are mounted in place.
Heliograph completed. I painted the figures (in this case just the main colours blocked in) before I added the foil 'mirror'
on the front of the PVC tube frame.

Note that this was the first one I made - the above 'how to' pictures are of the second attempt where I used the second piece of PVC tube on top of the apex - you can see this earlier attempt sits a bit lower - I think this original team looks better, but it's quite fiddly getting the mirror frame to stick on the apex of the tripod.
I'm sure there are improvements that can be made to this approach - but this provides a quick and easy heliograph post.

As these teams will be supporting units of the 42nd Division (East Lancashire), I'm designating these as signallers from the 427th Field Company - identified thanks to the excellent resource on the Field Companies of the Royal Engineers on The Long, Long Trail.
A group of men of 527 (2nd Durham) Field Company, a Territorial unit that served under command of 5th Division. 


Wednesday 26 August 2015

If the Lord Spares Us - Eureka Miniatures 'British in Sinai' 15mm

It seems the blogging hiatus is over! I'm back at the painting table and have started on a new project based on the Too Fat Lardies rules - If the Lord Spares Us - WW1 in the Middle East!

"Away from the quagmire of the Western Front ITLSU proves that brigade level games the Great War in the Middle East have components of everything; camels, arab war bands, sweeping cavalry attacks, opposed beach landings, massed machine guns, gas attacks, tanks, armoued cars, fighting in the mirage, water shortages, trench assaults, river gunboats - and enough command and control dilemmas to test the most cunning Pasha."

I'd been working on a 6mm (Irregular Miniatures) project for Gallipoli and the Middle East using Great War Spearhead II (and it's not abandoned), but I've wanted an excuse to buy some of Eureka Miniatures very nice WW1 15mm range – who can resist the Imperial Camel Corps, after all?          

To give me a little inspiration, I'm reading The Palestine Campaign by Field Marshal Earl Wavell P.C, G.C.B, G.C.S.I, G.C.I.E, M.C. (3rd Edn. by Constable, London, 1954). 

My intention is to begin with the defence of the Suez and work on slowly from there. 
Actions around the Suez, 1915-1916, from Wavell (1954).
Terrain is something I'll have to get working on, but the main effort will be on painting up a few infantry battalions for the British (and her dominions) and Ottomans, then onto some mounted, artillery, and armoured cars!

I must also thank Mark Hargreaves of the Over Open Sights for his generous provision of painting guides covering the Middle East campaigns - I strayed away from his recommendations (painting with what I had), but the inspiration was very well received. Thanks Mark!

Well, I am unashamedly a 'middle of the road' painter of miniatures - nevertheless, I enjoy it. Here's a few snaps of my first attempt. Two companies (4 bases per company in ITLSU) of the 42nd (East Lancashire) Territorial Division. These stout fellows did it all - defence of the Suez (1915), Cape Helles (May 1915 to January 1916), Egypt and the Sinai Campaign (1916 to 1917), and Western Front (1917 to the Armistice in 1918).

Their battle honours include:
  • Battle of Gallipoli: Second Battle of Krithia; Third Battle of Krithia; Battle of Krithia Vineyard
  • Battle of Romani
  • Third Battle of Ypres
  • First Battle of the Somme (1918): First Battle of Bapaume
  • Second Battle of the Somme (1918): Battle of Albert (1918); Second Battle of Bapaume
  • Battle of the Canal du Nord
  • Battle of the Selle
But, as they say, 'Pictures! Or it didn't happen!'


Thursday 25 December 2014

Māori skirmish

My Evil Gong Māori took to the field last night in a late night gaming session while the Christmas pudding was steaming away on the hob! Here's a couple of snaps of the early stage of the game.
The warriors entering the clearing from the south (bottom) see their opponents forming up on the far side.
First contact - individual combats dominate the game while the larger warrior groups close on each other.
I took advantage of a sunny morning the next day to get some close up shots.


Wednesday 17 December 2014

Evil Gong Māori

While WWI in 6mm has been the main focus of my attention for the past few months, with the Christmas Truce approaching, I thought I'd pop my head out of the trench for a small distraction.

I've had a box of Evil Gong Māori in 15mm sitting primed for a couple of years. The promise of some skirmish action in the near future has prompted me to take them the next step. Some of the sculpts are really quite nice and paint up well (and I've just slapped a quick paint job on these). There's a lot more work to do on the textiles for many of the figures - but here's a couple of in-progress teasers!


Sunday 24 March 2013

Beyond the 4th cataract: campaigns in Nubia during the New Kingdom

I've definitely been through a dry patch as far as DBA goes. I've not even been inspired to paint for several months (what's going on?!). I always find a campaign is the way to get me back into the saddle - so to speak.

So, the project is to be around the campaigns of the New Kingdom Pharaohs to conquer Nubia.

Spurred by threats from the south, Egypt’s New Kingdom pharaohs mounted military campaigns against Nubia, and by the Reign of Thutmose III (1479–1425 BC) Egyptians controlled Nubia to the 4th cataract. An Egyptian govenor administered the country called Kush and ensured the flow of Nubian gold to Egypt. Nubia also contributed exotic products such as animal skins, ivory, and ebony as well as dates, cattle, and horses prized for their quality. Despite being required to send many rich resources to Egypt, Nubia prospered during this period. Many Egyptians settled in Nubia, and Nubians moved north to Egypt. 
Egyptian pharoahs constructed temples throughout Nubia to honor Egyptian dieties, gods unique to Nubia, and themselves as divinities. The most important religious site in Nubia was dedicated to the Egyptian state god Amun. It was located at the foot of a sacred mountain (modern Gebel Barkal) at the frontier settlement of Napata near the 3rd cataract. Started by Thutmose III, this temple complex was elarged by later pharaohs.
New Kingdom Egyptian pharaohs conducted many campaigns to bring Nubia under Egyptian control.
Source:  http://oi.uchicago.edu/museum/nubia/nknapnk.html

Just a teaser to start the ball rolling.


Friday 19 October 2012

Ploughland

With the impending addition of 'ploughland' to the DBA terrain options for arable landscapes, there have been some excellent pieces of terrain being created. Some inspirational ploughland terrain created by Timurilank which can been seen at his Eighteenth Century Sojourn blog - have a look!

In the same spirit I will provide some before and after (when they're done) shots. Currently I'm using these pieces cut from a larger terrain mat I was working on a couple of years ago.


Wednesday 12 September 2012

Rupert routed in Wick Field, 12 Oct 1642

This year I'm repeating the ECW early war campaign I tested last year with the aim of fighting the battled on the actual days. Tonight it was Powick Bridge.

This year I tinkered a little more with the terrain to ensure Colonel Sandys' cavalry regiment had to fight its way down the lane leading Wick Field under fire from Rupert's dragoons behind the hedgerows, while providing some opportunity for Wick Field to come into play a bit more.

Deployment: with the Parliamentary force in the foreground
Rupert, deployed his dragoons in the wood along the lane, while his shot and main force of cavaliers remained in Wick Field. Parliament moved first and was obliged to move down the lane a full movement allowance in this turn.
Position about three turns into the game viewed from Royalist position.
All through the game Rupert's force suffered command issues (no Pips!) giving Parliament the initiative. This allowed Sandys' Regiment to charge down the lane while their dragoons cleared the woods - destroying Rupert's dragoons in the process.

A melee raged back and forth at the entrance to Wick Field but neither side could gain advantage.
Final dispositions on 12th October 1642

The break down in command among the Royalist forces (due to a lack of pips) resulted in teh second loss with Rupert's commanded shot getting caught out in the field on their left - having incautiously ventured out from the safety of the hedgerows - and was ridden down by cavalry and shot on Parliament's right. Rupert, sensing the day was lost, withdrew to Worcester to count the cost.

The Royalists lost one unit of shot and one of dragoons - Parliament had no losses. Replacements were rolled for by the Royalists (4, 5 or 6 on a D6 meaning a unit was replaced before the next battle) with the shot unable to be replaced but the dragoons were successfully reinforced. This will leave the king with only 11 elements at the next battle.

On to Edgehill!


Friday 11 May 2012

Grumpy Portuguese Colonials

My Grumpy Miniatures Colonial Portuguese DBA-RRR army is largely complete, at last! The list is based on a foot general with options of up to 11 shot, 3 blades, and 2 skirmishers currently. I've tried to give them a fairly ragged look and selected figures that reflect the volley and charge tactics common to the Portuguese.

The Grumpy sculpts are good in general (perhaps lacking a little variation) but my main complaint is a lack of definition in the bodies especially where bandoleers, baldrics and other straps and belts intersect over a padded jack - it proved hard to paint (at least when using my rather impatient style of painting!).


The next challenge is the Vereenigde Oost-Indische Compagnie (VOC) - again using Grumpy Miniatures. However, for the Dutch I have selected figures among the Grumpy range that suggest a well-supplied, more ordered look with most wearing morions. I'm not sure if such a clear variation is historically accurate, but it suits my ideas of how these competing colonial forces should look. After the VOC, its on to Indonesian/Malay armies to give these guys someone to fight (apart from each other).

I'm still battling with finding a suitable artillery piece for both Portuguese and VOC armies - I'd like to use some naval ordnance either in hastily constructed fortifications or being hauled using some makeshift method. Not east to find in 15mm.

Camps and BUAs are still very much in the conceptual stage.


Monday 16 April 2012

Parliament routed at Turnham Green!

Much alarm has struck the people of London with the news that the parliamentary army under Lord Essex that marched out from Chelsea Field to meet the King's army this very morning, has met with terrible defeat in a battle at Turnham Green in Middlesex. Early accounts of the battle suggest great loss of life among the Parliamentarian force, the remnants of which are currently flooding back into London.

Historically, the stand-off between the two armies at Turnham Green was at best a stalemate for Charles, and probably is better characterised as a defeat. After avoiding an engagement at Turnham Green:
Charles (once more contrary to Rupert's advice) retreated back up the Thames Valley towards Oxford (losing the possible chance for a flanking movement through loyal Kent), where Charles set up his headquarters for the rest of the war. Never again during the Civil War would the Royalists come as close to capturing London and without London they could not win the war. (http://en.wikipedia.org/wiki/Battle_of_Turnham_Green)
However, in this last battle of this 1642 DBA-RRR campaign, Rupert's initiative and determination to press home his successes in the Thames Valley effected quite a different outcome. The battle opens with the two armies arrayed in the common form in the 17th century – foot to the centre and cavalry on the flanks – in the open space formed by Turnham Green, Acton Green and Chiswick common field.


With the end of the campaigning season approaching, the fields of Middlesex were wet and Charles' army, under the commend of the Earl of Forth, stood amongst the enclosures near Sutton court, with boggy ground to its rear. Essex drew up his army between the Great West Road and Chiswick Village, his troops taking what cover they could from the enclosures around Home Field.
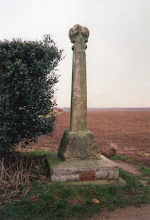
The Royalists (foreground) deploy on Turnham Green
For some time the armies stood firm in the still morning air, eyeing off the deployment of their foes. The Parliamentarian force was content to sit in its defensive posture with its commanders satisfied with blocking the King's advance on London. Charles, however, saw the opportunity to strike a decisive blow against Parliament paving the way for an advance among the loyal Kentishmen to London's south. Buoyed by Rupert's victory at Brentford the day before, the King's ordered his commanders to press forward. The calm was shattered by the barking of orders by sergeants and the roll of drums as the Royalist line advanced onto Turnham Green.
As the foot advanced in the centre, the Royalist cavaliers swept out along the road to London threatening the lesser force of cavalry on the Parliamentarian right flank. Seeking to seize back some of the initiative, Essex ordered a general advance out of his defensive positions onto the Green. Essex's cavalry formed a line to meet the advancing cavaliers and his shot, which outnumbered their Royalist opponents, wheeled menacingly towards the Royalist right. Rupert ordered his dragoons out wide to reduce the risk of the artillery at Chiswick House being flanked.

Essex and his heavy cavalry rode furiously to stiffen the resolve of his cavalry as the cavaliers formed a line of battle that would soon overlap the parliamentary right flank. The drumming of hooves mixed with a thunderous cannonade as both Essex's and Charles' foot marched within range of their opposing guns. Charles ordered his foot to wheel to meet Essex's shot on his right and close to musket range.
 The resolute charge by Charles' cavaliers broke and scattered the cavalry on the Essex's extreme right and pushed back the others leaving the commander's Lifegaurd of heavy cavalry surrounded and hard pressed. Essex ordered his Lifegaurd to withdraw fearing they would be surrounded. Meanwhile the Royalist foot in the centre was kept from closing by the furious cannonade. Charles ordered his heavy cavalry into the centre with orders to silence the Parliamentarian guns.

With his right flank collapsing Essex ordered his foot to push hard on the left. Parliament's shot advanced into musket range engaging the Royalist foot and artillery outside Chiswick House hoping to turn the tide with their greater numbers. Musketry clattered as both lines gave fire. Smoke bit at the eyes of the musketeers and lead tore at flesh. Despte their resolute advance Essex's foot faltered with an entire regiment decimated in the centre of their line. The Royalist dragoons rode in at bit at the heels of the Parliamentarians as they fell back in disorder.

The cavaliers on the King's left flank continued to press hard seeking to surround and destroy Essex's Lifegaurd. But this was not without cost as Parliament's heavy cavalry stood firm and shattered a charge to their front, decimating a cavalry regiment. With the initiative firmly with the King, the collapse in command among Essex's forces left the artillery in the centre at the mercy of the King's heavy cavalry as the heavy foot fell to the push of pike. Amidst the chaos in the Parliamentarian ranks, Essex's Lifegaurd were surrounded by a final charge of the King's cavaliers. Despite repeated countercharges with their pistols spewing fire and lead, they were annihilated (note the 6-6 close combat roll!). Essex, now commanding the last regiment of calvary on the field, held his ground protecting the flank of the Parliamentarian foot from utter destruction as it fell back in disorder and finally routed from the field.
 Charle's army had decisively defeated Essex (1:4 elements lost) and with the campaigning season almost at an end, decided to march his army south with the aim of overwintering among rich countryside of Kent to reinforce and reequip his troops for the final push on London in the Spring of 1643.

Here ends this DBA-RRR 1642 mini-campaign. While the outcome at Turnham Green would suggest a decisive Royalist victory, the victory conditions should be consulted to reassure the reader of this result.