Showing posts with label terrain. Show all posts

Friday 2 September 2022

Split rail fences for 2mm ACW

Felling the timber, splitting it into rails and stacking it along your farm boundaries must have been a punishing task in the 19th century.

Punishing, in a very different way, is an apt description for scratch building split rail (snake) fencing for my 1:800 (eg. 2mm) ACW terrain!

I have to admit these little guys spent more time stuck to my fingers than to their bases. Nevertheless, the struggle yielded the equivalent of 14 chains (chain = 22 yards) of fencing for Wilmer McLean’s farm.

The method, while fiddly, is fairly strait forward.

I cut a series of 50mm x 1mm strips (sorry, back to metric for this) of 0.5mm Evergreen Styrene sheet which was scored every 5mm on opposite sides.

I then bent each scored point to form a zigzag long enough for my bases. This was attached to the base (via being glued to various fingertips) using Superglue. Then 5mm lengths were scored in the centre and bent into a right angle piece using tweezers. These were glued to the outward facing points of the fence to represent the crossed over rails.

The roughed up 45mm x 10mm base of styrene was coated carefully with fine sand (using PVA) and then undercoated with Vallejo grey primer (73.601). I washed the dry undercoat with Liquitex raw umber acrylic ink. Then, I painted the fence rails dark brown. These were dry-brushed with Army Painter Drake Tooth. My flower meadow mix of flocking was glued in place then a light coat of Vallejo Mecha Dark Rust wash (a staple in my paint collection) was applied on the rails. Done!


These simple 2mm terrain pieces add, I feel, some period flair to ACW battlefields at this scale. Maybe cornfields and a peach orchard next!

Saturday 27 February 2021

Sci-fi crystal outcrop scatter terrain (scratch built)

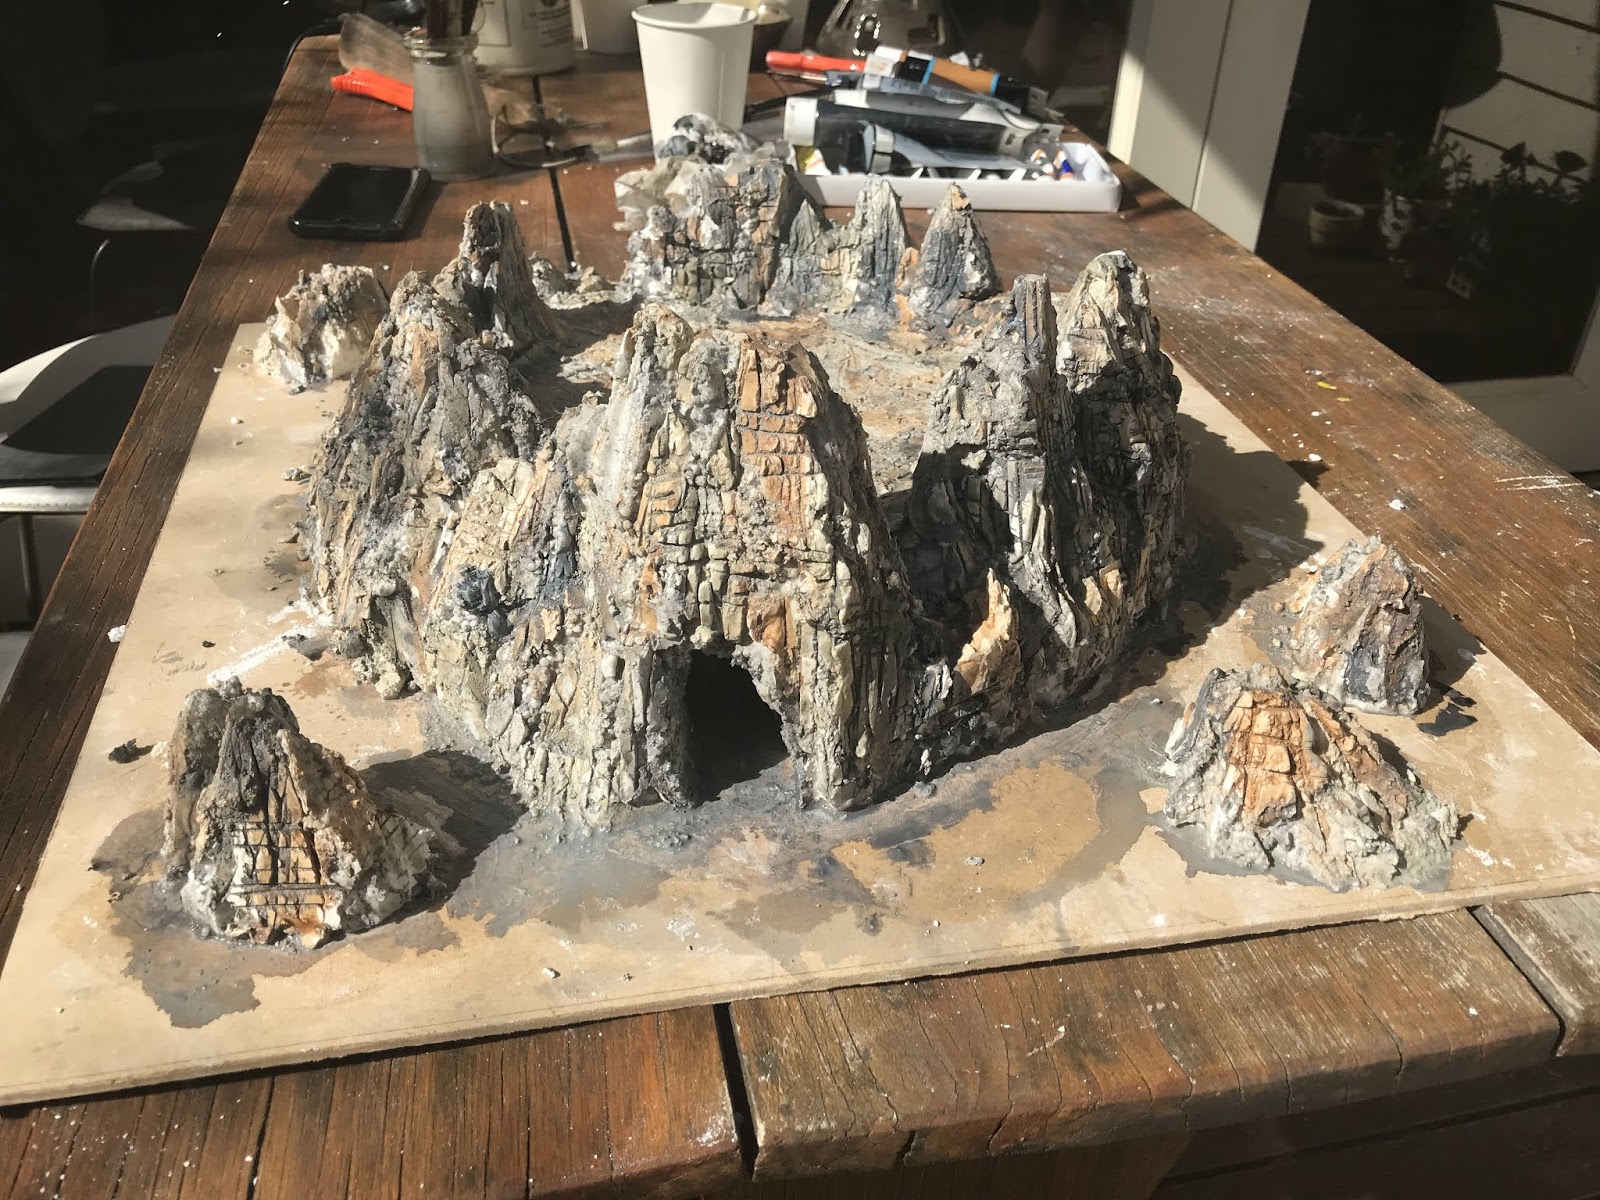
Rocky outcrops seem to be a staple piece of scatter terrain for all sorts of skirmish gaming. I've wanted to try may hand at crafting crystal terrain for sci-fi gaming and role playing for some time. I have never tried any sci-fi skirmish gaming so I though this might kick-start that with a bit of cool and adaptable terrain.


Here is a quick summary of the project!

The The base structure is built out of 30mm and 50mm XPS insulation foam from Kanuf. I used the 30mm for the base and (a combination of both for the crystals. 

The cutting was all done with a craft knife with a new blade so as to minimise tearing. The best result visually is achieved if you have an odd number of crystals per base and a range of sizes - I didn't always follow this rule, though! I used angled cuts with the knife to give texture to the edge of the base and to great some cracks in the crystals (see below). 

Then, I applied a stone-like texture to all the surfaces (before gluing) with a ball of aluminium foil. The crystals were hot glued to the foam base and in some cases I used a toothpick to help reinforce the join.

The whole piece is then coated with a sealing coat of Matte Mod Podge with black acrylic paint. The mix is roughly made up as follows: 4 parts Matte Mod Podge to 1 part black acrylic paint. The ratio is not critical - just use what looks good to you. I left these to dry completely. It looks glossier in the picture below that it does in reality.

The first top coat is a dry brush with Mont Marte Emerald Green for their Dimensions acrylic paint range. You can use any cheap paint you like but I did find this colour was particularly good for this project. I left a fair bit of the black undercoat showing through - especially in the thicker sections of the 'crystals' to create a sense of shadow and lower opacity.


Next, I applied a black wash to all the surfaces using a mix made up of approximately, 20 parts water, 1 part black paint, 1 part acrylic medium and 3-4 drops of dish washing detergent (see below). This must be allowed to dry completely.
Finally, I mixed about three lighter shades of the Emerald Green and blended them out towards the edge, leaving the centre pretty dark to give a sense of depth. The edges of the crystals were then picked out with white (especially where they intersect).

Here's a couple of shots of the final product with some Eureka Miniatures 1980s US minis in NBC gear (painted for post apocalyptic gaming).


Monday 28 January 2019

A craggy protuberance

I need a craggy hill for the D&D adventure I’m working on - a great opportunity to try out my new interest in foam crafting! Still a WIP but here’s a progress shot or two.


Tuesday 9 October 2018

Scratch built Nissen Huts, road barriers and shipping container 28mm

So often I find that terrain ideas are the motivation for new projects. Currently, I'm working on some  items that lend themselves more to a Cold War era post apocalyptic setting than the classic Pulp that he’s been my recent focus.
'The Road' (Source)
My hope is that this will inspire some 'Apocalypse Alley' gaming using Pulp Alley rules based around the aftermath of a nasty biological weapon exchange. The leagues will give me the opportunity to use some of the Eureka Cold War era moderns in like thev 28mm US and Soviet lines they have in NBC/MOPP gear. Link

Keeping to my (nearly) zero budget terrain philosophy, I have been working mostly with cardboard, cork and wire mesh. Here are a few of the creations and the inspiration for them.

'The Base' - a quick layout of the components I have built so far. At the moment I'm working on roads, finishing the perimeter fence and helipads.

I love the look of these old Nissen huts built using 90mm postal tube and corrugated cardboard. The construction process is set out in a great article by Dennis Berwick

This bird's eye view of the base shows the mysterious generator spewing out toxic goop on the bottom right. Ultimately this will be outside the perimeter of the base.

These street barricades are simple to make and will be useful for a range of modern settings. I used a cool tutorial by FearDaAlien. They just need some ballast in the bottom as, being made out of foam, they tend to fall over easily.

I've wanted shipping containers for ages - always been looking in toy stores etc. At last, I've found a great tutorial on Panzerfaust Nostalgia for making them out of card. I'm very happy with the result. Now for mass production! The container made out of 1mm card stock with craft store corrugated cardboard glued to the outside and plastic tubing for the locking mechanism.
Thant's all for now. Study and work are weighing heavily on my crafting time - but the light is at the end of the tunnel!

Just as an aside, I found this nice little article on post-apocalyptic ecology: http://strangehorizons.com/non-fiction/articles/ecology-and-the-post-apocalypse/

Sunday 22 April 2018

Sea mat - ready for action

Having spent the last few weekends focused on study, I decided to treat myself to an hour in the shed today to finish off my third gaming mat. My 2mm Thirty Years War project (see previous post) requires more attention than I can give it at present, so I was looking for an easy task.

I've had a sea mat half-made for some time and wanted to get it done to encourage me to return to some naval gaming. It's been some time since my 1:2400 Russo-Japanese War, Second Balkan War Ottoman and Greek fleets and WW1 ships have seen any action.
I've been pleased with the results I've had from gaming mats constructed from a painter's drop-sheet with acrylic caulking compound applied to provide some texture.
For this mat I used a dark grey caulk which provided a good base color. Over this I laid a wash of ultramarine blue then, after that dried, I picked up the texture with a dry-brush of off-white acrylic house paint. Once the paint was dry I applied an acrylic, semi-gloss clear sealant I purchased from an automotive supplies shop (for another job).
The result is a moody sea with a slight hint of reflection provided by the sealant (it was looking a little too matt without that). Someone with more patience than I would, no doubt, find the ideal method to provide the impression of the white caps on the waves. Perhaps using a sponge might have been the way to go?
For less than 2 hours work in total (not including drying time), I'm happy with the outcome and can't wait to get the ships out (well, I already have, as you will see!).

Update 22/04/18
The mat will be good for my air war over the Falklands project too.
Argentine Mirages send some 'hot stuff' towards a Vulcan bomber and its escort.

Saturday 10 June 2017

Ottoman fort for V-Beach

Preparations continue for the next game - A Bloody Morning at V-Beach. This is based on the 2010? TFL Christmas Special scenario using the If the Lord Spares Us rules. It covers the Cape Helles Landings at V-Beach on 25 April 1915.


I have the board pretty much set up having (since the picture above) added a considerable number of barbed wire entanglements to the collection (you can never have too many!)  leaving only the two forts at either end of V-Beach to be completed, something to represent the SS River Clyde and some landing boats.

Tonight , I finished a very quick scratch guild (in cork) of a small, rather generic, Ottoman fort that will act at Ertogharal Fort sitting above the low cliffs at the west end of V-Beach. The above map suggests the fort was largely a gun emplacement so I'm looking into converting it to include some large naval guns to give the right feel.

However I've kept it pretty generic as I want to use if for my other ITLSU scenarios in Palestine and Mesopotamia. And who knows when I might need a fort in Belgium for some Western Front action!

Sunday 12 March 2017

Skirmish Sangin: Patrol Scenario set up

More experimentation with Afghanistan terrain. I'm feeling like I need to ditch the palms and come up with some different - less European looking trees.


Sunday 19 February 2017

Terrain boards for Afghanistan

A chance find of ten sample posts of a promising looking paint color at the local hardware store has prompted a weekend of terrain board building for my Afghanistan project. The idea is to build some fairly generic rocky desert boards that I can also for gaming WW1 in the Middle East.

Having tried my hand at terrain mats in the past - and finding attempts to built contours up under mats largely unsatisfactory -  I am going to try using flat terrain boards and add-on terrain for the various features. I'm using 6mm MDF for the base boards.

The paint I found was an acrylic 'suede finish' in a mid grey. It dries with almost a chalky surface. As mentioned, they were a series of unwanted color post being sold off for $1 a can - bargain. I'd never seen this finish before and I could see the potential for this use.
Few people would welcome that color sample as being of interest - rich pickings for a wargamer!
I started with a based coat on lightly sanded MDF and scattered some grit over the top while wet. I just used the sandy colored gravel I have use for landscaping, which you can see on my miniature bases as well - a lifetime supply of basing materials!
Once it dried, I knocked off the larger pieces of gravel with a scraper, leaving the more sandy textured finish. To this I added a second coat of suede paint - and a coat on the underside to overcome warping.

Leaving that to dry well - I then sponged on some yellow ochre craft paint and then dry-brushed with a 'sand' colored acrylic.

I finished the boards with a spray of a clear varnish I had at hand - the result is fairly good for an  unplanned project (which, let's face it, most of mine are!).

I couldn't resist taking a a few pictures of the growing collection of terrain and some of the completed Eureka USMC and Afghani 28mm miniatures. The compound design and technique is thanks to Matakishi. My terrain has a long way to go, but the boards are a huge step up from what I was using!