Saturday 27 February 2021

Sci-fi crystal outcrop scatter terrain (scratch built)

Rocky outcrops seem to be a staple piece of scatter terrain for all sorts of skirmish gaming. I've wanted to try may hand at crafting crystal terrain for sci-fi gaming and role playing for some time. I have never tried any sci-fi skirmish gaming so I though this might kick-start that with a bit of cool and adaptable terrain.


Here is a quick summary of the project!

The The base structure is built out of 30mm and 50mm XPS insulation foam from Kanuf. I used the 30mm for the base and (a combination of both for the crystals. 

The cutting was all done with a craft knife with a new blade so as to minimise tearing. The best result visually is achieved if you have an odd number of crystals per base and a range of sizes - I didn't always follow this rule, though! I used angled cuts with the knife to give texture to the edge of the base and to great some cracks in the crystals (see below). 

Then, I applied a stone-like texture to all the surfaces (before gluing) with a ball of aluminium foil. The crystals were hot glued to the foam base and in some cases I used a toothpick to help reinforce the join.

The whole piece is then coated with a sealing coat of Matte Mod Podge with black acrylic paint. The mix is roughly made up as follows: 4 parts Matte Mod Podge to 1 part black acrylic paint. The ratio is not critical - just use what looks good to you. I left these to dry completely. It looks glossier in the picture below that it does in reality.

The first top coat is a dry brush with Mont Marte Emerald Green for their Dimensions acrylic paint range. You can use any cheap paint you like but I did find this colour was particularly good for this project. I left a fair bit of the black undercoat showing through - especially in the thicker sections of the 'crystals' to create a sense of shadow and lower opacity.


Next, I applied a black wash to all the surfaces using a mix made up of approximately, 20 parts water, 1 part black paint, 1 part acrylic medium and 3-4 drops of dish washing detergent (see below). This must be allowed to dry completely.
Finally, I mixed about three lighter shades of the Emerald Green and blended them out towards the edge, leaving the centre pretty dark to give a sense of depth. The edges of the crystals were then picked out with white (especially where they intersect).

Here's a couple of shots of the final product with some Eureka Miniatures 1980s US minis in NBC gear (painted for post apocalyptic gaming).


Sunday 20 December 2020

Scratch building Old West Buildings in 28mm

My youngest came up to me recently and said, wouldn't it be cool to play a miniatures game based around Cowboys and Aliens (not so much the movie, but the genera in general)! Well, I'd never considered gaming the Old West as an option - no reason, just wasn't my scene. But the idea was intriguing and we were heading toward (what would be months of) isolation and I knew a large terrain project would be just the ticket!

In terms of gaming, there was a plethora of rules to choose from. I wanted a simple set of Old West skirmish rules and have selected Shootin Iron by Dave Bezio's Grey Area Games.  I also thought the Weird West gaming sub-genera might offer a good setting as well and have purchased Dracula's America: Shadows of the West by Osprey Publishing which looks like it will fill that need admirably.

Construction technique
The main structure of the buildings was made from 5mm foamcore which I got cheap from my local art supplier as it was 'water damaged' (but was fine in reality). In general, I used a wall height of 50mm with the false fronts of the commercial buildings being around 120mm tall. To ensure all the interior spaces were playable, I used removable gable and skillion roof types also made of foamcore.


The exterior wall cladding was made with 190mm x 6mm coffee stirrers using a range of techniques including weatherboard/clapboard, vertical wood sidings and a board and batten siding - a style of exterior siding that uses vertical boards with “batten,” a vertical strip of wood to cover the seams.


Once the cladding was applied with hot glue I textured and weathered it by scratching an exaggerated wood grain into the coffee stirrer and then randomly bevelling the edges and cutting cracks into the ends of planks.


The false fronts common to this era of commercial buildings were cut to a range of shapes to add a bit of interest and a combination of vertical and horizontal cladding applied to create a space for the signage and to add some character.

Flooring was added using the same coffee stirrers and textured the same way as the cladding.


Roofing types used included tar paper and battens, shingles and occasionally some corrugated iron. The shingles were cut from cardboard with each shingle being 5mm x 5mm. For the tar paper I used very fine grit 'wet and dry' sandpaper with wood battens. Corrugated iron was just corrugated craft paper.


The finish I wanted for the buildings was that of very aged timber - timber that had not been painted for a long time (if at all) - giving a run down, or possibly abandoned appearance. I used Platypus Scotsman's Grimdark Church as inspiration. I also took some inspiration from an old church I saw in West Bendigo during a stay in the Victorian Goldfields last winter (in the 2 weeks between months-long lockdowns for COVID!).
This old Protestant Church was converted into a recording studio

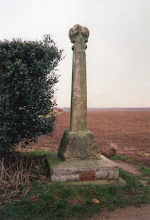
Poppet head on the Nell Gwynne Reef in West Bendigo. It was a cold, foggy stay (just as I like it) 

The exterior surfaces were painted using the following technique:
  1. Coat all surfaces with a mix of Matte Mod Podge and black paint (using the method described by Black magic Craft).
  2. Brush all surfaces with a dark grey using a fairly wet brush to get good coverage (but leaving a little back in the deeper texture.
  3. Dry brush with a light grey
  4. Then add a very light dry brush of white.
  5. Using an Army Painter mid-brown wash I add some semi-random colour variations tot he planks
  6. Coat the whole surface with a black wash - like Mel describes here:
  7. Once it is completely dry, add very selective light grey and then white dry brushing to highlights using downward stroked to pick up surfaces light would hit.
  8. Finally, using a flat scraper in a carving tool set, I gently work all the surfaces to scrape off any thick areas of colour - this gives a very worn, aged look tot he exterior surface.

Blurry, but atmospheric! Figures by Artizan.


Doors are wither cut from wider 'tongue depressor' style sticks or were legend and brace doors made up using the coffee stirrers.

Windows were made using thick clear plastic from take away food containers (the rectangular type) and very thin basswood strips obtained from a model railway supplier. I cut the plastic to the size of the window opening (all windows included vertical window frames that the plastic could be glued to) and then glued (with super glue) the basswood to the outer edge and to provide the mullions in the window. Just make sure you paint it to the final colour before you glue it onto the plastic as you can see the timber colour from the insider (found that out the hard way!).


Eyeing off the 'hoopleheads' from the balcony of the saloon.

All of my techniques need a lot of refining - especially the doors and windows - but this project certainly kept me entertained in the quiet moments of the first wave of COVID.


Thursday 11 June 2020

I'm going back ... Back to the Blogosphere!

Back to Blogging

It's fair to say this has been a neglected blog, of late. Mostly, because I have focused in the past year on posting on my Instagram account Models From Scratch

While the crafting community on Instagram and YouTube are a wonderful bunch, and it's a great platform to display your work, blogs provide a great opportunity to give more detailed posts and (importantly) somewhere to record your techniques. There is nothing worse than nailing a colour scheme only to go back a year later and not being able to reproduce it! 

Anyway, I hope to get back to more regular blogging with a focus on posts about scratch building terrain and even some gameplay (shock, horror!).

Iso projects

As it is for all of you, life has been dominated by social distancing for a couple of months now. In Australia we've had a fairly easy run with COVID-19 (thanks to decisive action by all levels of government). That said, the financial impact on many has been horrendous. Luckily I've dodged that so far with a job that translates well to working from home. But, the crunch is yet to come in my sector (higher education).

Over the next few posts I'll give some updates on the following projects:
  1. Building an Old West mining settlement for some Cowboys and Aliens - Old West / Weird West skirmish gaming;
  2. Crafting terrain and miniatures for an antipodean setting for Of Gods and Mortals;
  3. Building a shanty town and waaaay too many shipping containers for a post apocalyptic setting!
  4. Update (25 July 2020) ... and, a 2mm Biblical Armies project that has sprung out of nowhere!
 Here's a taster of the upcoming posts:

A shanty town well suited to modern setting and post apocalyptic gaming made of cork sheet using methods learned from Matakishi and Platypus Scotsman.
Kulpunya - a giant spirit dingo (scratch built) and Denisovan minis from Eureka Miniatures for a planned display game of Of Gods and Mortals (Osprey) at the (sadly) cancelled Little Wars Melbourne 2020.
My growing Old West town. After binge watching Deadwood (for the first time) I could not resist painting my favorite characters using the Al Swearengen and Wild Bill minis from Artizan recently purchased from War and Peace Games.


Saturday 28 September 2019

2mm ACW (with updates)

Amidst the mountain of rules I’ve downloaded over the years, I’ve recently found a copy of  Who Shall Rule this American Nation? - simple ACW rules written with the 2mm gamer in mind. They are aimed at divisional or corps level gaming.

Update: I have since discovered that the rules are part of a collected set by John Bobek, The Games of War: A Treasury of Rules for Battles with Toy Soldiers, Ships and Planes (2007): https://boardgamegeek.com/boardgame/37718/games-war-treasury-rules-battles-toy-soldiers-ship  A copy is on its way in the next week or two! I will review the rules in more detail then.

The mechanics of movement, shooting, melee and morale are provided but the set lacks a turn sequence and the morale rules are a bit unclear - but the rest is solid. I’m playing through a game to the identify gaps and will write up some homegrown solutions.

Update: thanks for a Review by Ryan Morgan on the above BGG page, I have learned that 'In chapter one Mr. Bobek lays out the ground work for interpreting his rules in the further chapters as well as discusses his philosophy for wargaming.'

At this point I just wanted to post some shots of the initial few turns and I will update on my thoughts soon. This blog has been quiet for too long!


I’ve also been experimenting with creating woods terrain for 2mm using Casuarina cones coated in flock - there are some WIP images below.  I'll post a short tutorial next.


Monday 28 January 2019

A craggy protuberance

I need a craggy hill for the D&D adventure I’m working on - a great opportunity to try out my new interest in foam crafting! Still a WIP but here’s a progress shot or two.


Monday 31 December 2018

Crafting for D&D 5e

At a pre-Christmas get together with some gaming buddies I was discussing how the Netflix series Stranger Things had reenlivend interest in Dungeons and Dragons with my kids. I had been using AD&D manuals that I had since my early days of role playing in the late 1970s. The chap I was yarning with suggested I try fifth edition (5e) suggesting there was a lot of news stuff we were missing out on. I was keen to see where D&D had gone over the years, so challenge accepted!

So, the young bloke’s Christmas stocking was stuffed with some Eureka dungeoneer miniatures, the 5e Dungeon Masters’ Guide and a DM’s screen as a bit of a kick starter. I find using some miniatures and dungeon tiles or terrain helps the kids engage with the action sequences better (although in many parts of an adventure we stick to ‘pure’ paper and dice role playing).

Of course, I need very little encouragement to take up a new crafting project and swiftly got onto making some dungeon tiles. There is a wealth of advice on YouTube for dungeon crafting and I adopted the 2.5 D dungeon tile approach used by The DMG with reasonable success. I used foamcore instead of cardboard which worked fine. I have created a basic set of about 20 tiles but am working towards the full set of tiles outlined by DMG:


While searching for some additional goodies to populate the dungeon with I happened across the Black Magic Craft channel on YouTube which, among the huge catalogue of really useful videos, has a great tutorial for crafting an Earth Elemental out of foam here. Here’s my attempt at the build - I’m happy with the results. I particularly think adding some areas of ‘dirt’ using model railway ballast gives the model even more of a feel of having just having been conjoured from the landscape!

I highly recommend you check out The DMG.info and Black Magic Craft - great channels.

More dungeon goodness will follow. Thanks for dropping by.
NB: this is my first post using an iPad - not a happy choice for Blogger - apologies for formatting issues!

Tuesday 9 October 2018

Scratch built Nissen Huts, road barriers and shipping container 28mm

So often I find that terrain ideas are the motivation for new projects. Currently, I'm working on some  items that lend themselves more to a Cold War era post apocalyptic setting than the classic Pulp that he’s been my recent focus.
'The Road' (Source)
My hope is that this will inspire some 'Apocalypse Alley' gaming using Pulp Alley rules based around the aftermath of a nasty biological weapon exchange. The leagues will give me the opportunity to use some of the Eureka Cold War era moderns in like thev 28mm US and Soviet lines they have in NBC/MOPP gear. Link

Keeping to my (nearly) zero budget terrain philosophy, I have been working mostly with cardboard, cork and wire mesh. Here are a few of the creations and the inspiration for them.

'The Base' - a quick layout of the components I have built so far. At the moment I'm working on roads, finishing the perimeter fence and helipads.

I love the look of these old Nissen huts built using 90mm postal tube and corrugated cardboard. The construction process is set out in a great article by Dennis Berwick

This bird's eye view of the base shows the mysterious generator spewing out toxic goop on the bottom right. Ultimately this will be outside the perimeter of the base.

These street barricades are simple to make and will be useful for a range of modern settings. I used a cool tutorial by FearDaAlien. They just need some ballast in the bottom as, being made out of foam, they tend to fall over easily.

I've wanted shipping containers for ages - always been looking in toy stores etc. At last, I've found a great tutorial on Panzerfaust Nostalgia for making them out of card. I'm very happy with the result. Now for mass production! The container made out of 1mm card stock with craft store corrugated cardboard glued to the outside and plastic tubing for the locking mechanism.
Thant's all for now. Study and work are weighing heavily on my crafting time - but the light is at the end of the tunnel!

Just as an aside, I found this nice little article on post-apocalyptic ecology: http://strangehorizons.com/non-fiction/articles/ecology-and-the-post-apocalypse/