V-Beach was a "...sandy strip some 10 yards wide and 350 yards long, backed along almost the whole of its length by a low sandy escarpment about 4 feet high, where the ground falls nearly sheer down to the beach." (Sir Ian Hamilton's Dispatch of the 20th May, 1915). Behind was a concave grassy slope rising to the cliff edge between Sedd ul Bahr village and Cape Helles. The slope was lined with thick entanglements of wire set by the Turkish defenders.
 |
| Defenses of V-Beach, 25th April 1915 |
In the early morning of the 25th April, 1915, was to be made by boats containing three companies of the 1st Royal Dublin Fusiliers, followed by the collier "River Clyde" with the rest of the Dublins, the 1st Royal Munster Fusiliers, half the 2nd Hampshire Regiment, and other troops. The place was very strongly fortified, and during the 25th the landing was partially carried out at the cost of very heavy casualties. On the morning of the 26th, Colonel Doughty-Wylie and Captain Walford, who were killed during the fight, led the survivors on the beach to the capture of Sedd ul Bahr village and the Old Castle above it. (Source: http://battlefields1418.50megs.com/v_beach_cemetery.htm)
 |
| The boats with the 1st Royal Dublin Fusiliers row ashore while the SS River Clyde (bottom left) prepares to ground itself in the early hours of 25th April 1915. |
 |
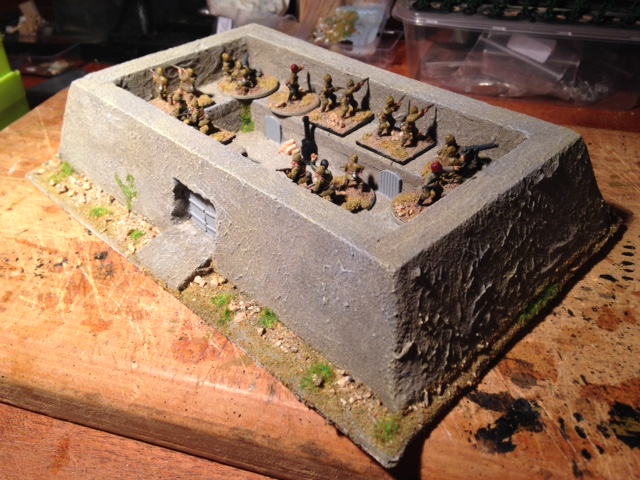
| Turkish machine gunners in Sedd ul Bahr fort survey the empty shoreline. A stove in Fort No. 1 send out a lazy plume of smoke in the cold morning air. |
 |
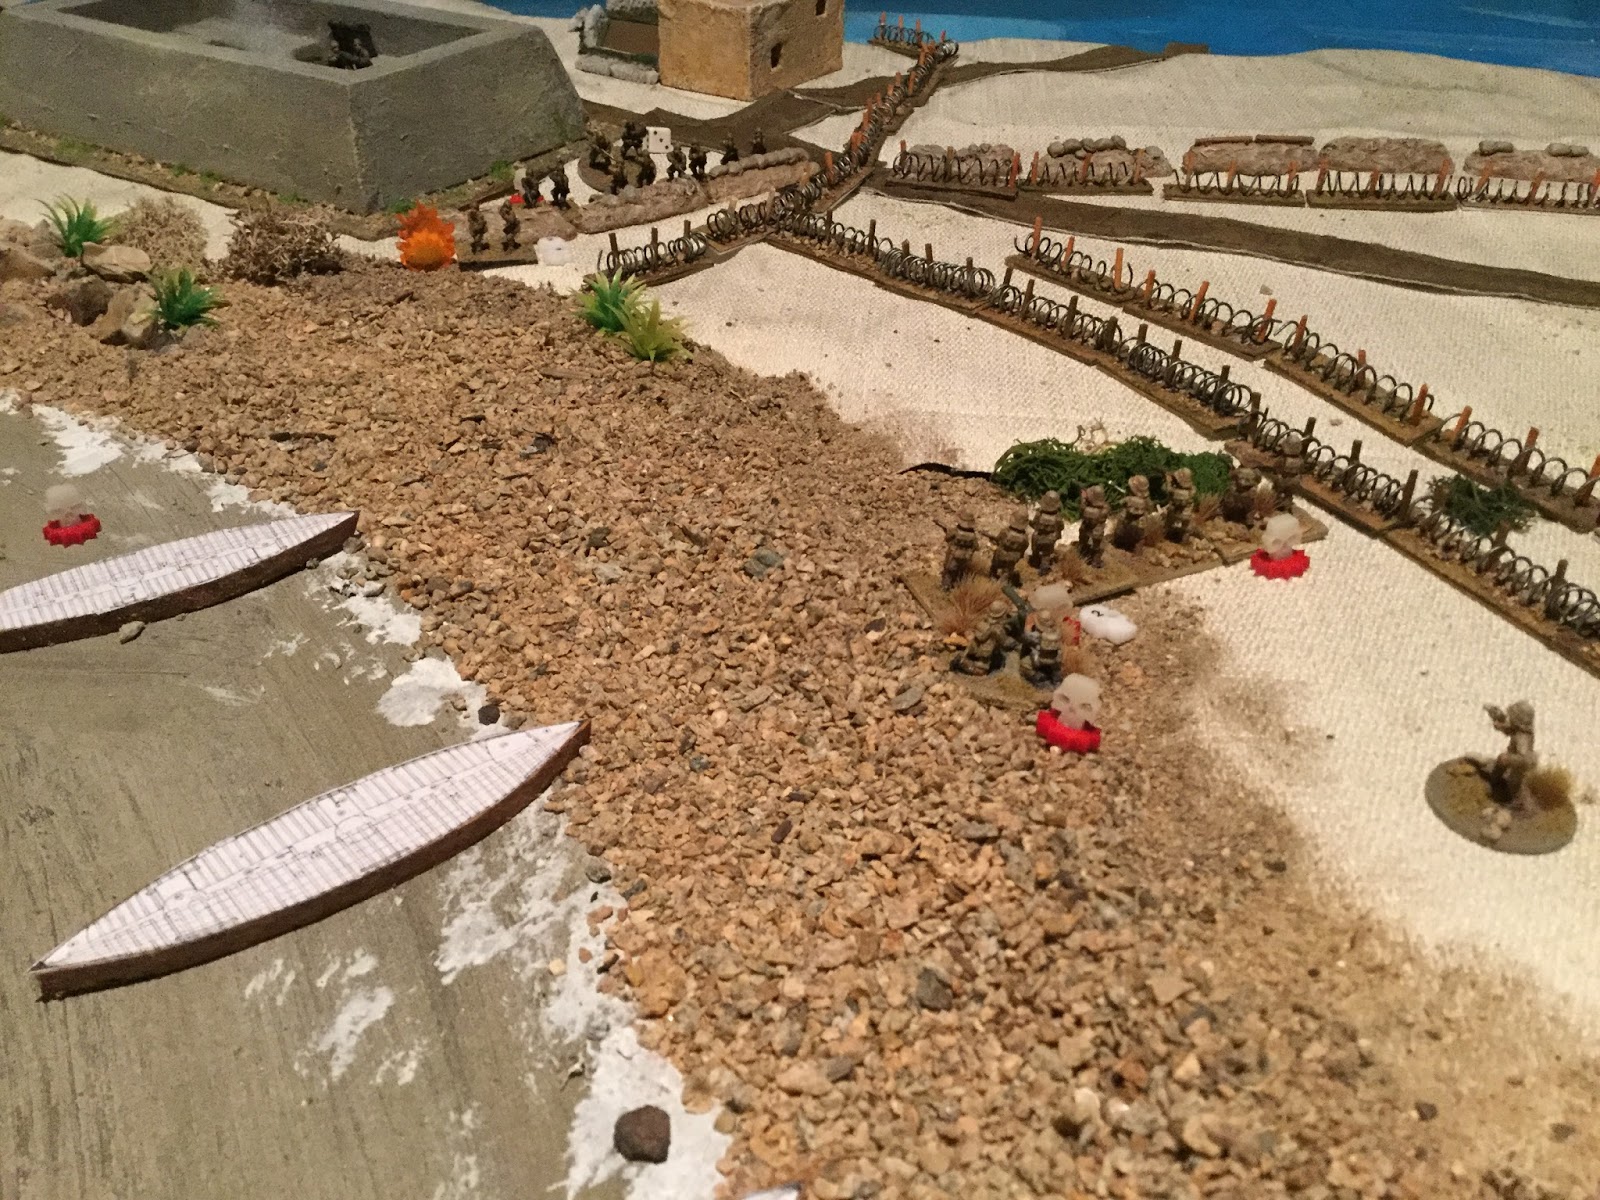
| The Turkish wire entanglements and entrenchments behind V-Beach present a major obstacle to anyone who gets off the beach. |
 |
| The boats of the Royal Dublin Fusiliers make the final approach to the shore in the early light. The locations of the Turkish defenders are not yet known. |
 |
| The Royal Dublin Fusiliers are under fire the moment their boats touch the shore as Turkish MGs sweep the beach from Sedd ul Bahr fort and the trenches beside Fort No. 1 (top left). |
 |
| "Get ashore, Lads!" |
 |
| The SS River Clyde runs smoothly ashore 'without a tremor' under the fort. Sally ports cut into the site of the ship are opened and gangways set in place. Commander Unwin and Able Seaman William Williams (of the SS River Clyde) climb down to set up the lighters to form a bridge between the ship and the nearby spit of sand under heavy fire. |
I stayed on the lighters and tried to keep the men going ashore but it was murder and soon the first lighter was covered with dead and wounded and the spit was awful; the sea around it for some yards was red. (In Les Carlyon, Gallipoli, MacMillan, 2014)
 |
| The Royal Dublin Fusiliers take heavy fire from the Turkish MGs as they leave their boats. |

 |
| The Royal Dublin Fusiliers can't get off the beach and the Turkish MGs are taking a terrible toll. |
 |
| The remaining Royal Dublin Fusiliers push up the beach but Turkish rifle fire from the trenches halts them. One company is already annihilated. |
 |
| The Royal Munsters charge out the sally ports on the SS River Clyde and are met with a hail of bullets. |
 |
| Above the Ottoman Lines |
 |
| The British just can't get the initiative - the Tea Break card comes up all to regularly and the Turkish MGs get to fire as they are within 'effective range'. |
 |
| The Turks start to file down the trenches to a position in front of Fort No. 1 |
 |
| Another company of the Royal Dublin Fusiliers is lost. |
 |
| The number of troops now exiting the SS River Clyde starts to give the British some hope of getting a toe hold on the spit. The Royal Dublin Fusiliers continue to fight for their lives. |
 |
| 'Keep going Lads!' |

 |
| The bloody end of the Royal Dublin Fusiliers. |
 |
| Finally, some of the Munsters get ashore on the spit - at a terrible price. |
 |
| Fire from the Munsters and the British MG on the SS River Clyde starts to suppress the Turkish MG in Sedd ul Bahr fort |
 |
| The 2nd Hampshire Regiment finally makes its way down the gangways slippery with blood and littered with dead and wounded. |

 |
| A small detachment of Turkish infantry below Sedd ul Bahr fort also slow the British advance. |
 |
| Having decimated the Royal Dublin Fusilier, at the far end of V-Beach the Turks file down and deploy their MG to the commanding walls of Fort No. 1. |
 |
| The MG in Sedd ul Bahr fort is suppressed by rifle fire from the spit and the MG on the SS River Clyde, but the MG in Fort No. 1 now sweeps the beach. |
 |
| The Munsters are enfiladed by the MG at the other end of the beach and take heavy losses. |
 |
| Push on! Push on! The British MG returns fire. |
 |
| The tide turns! The Turkish MG in Fort No. 1 is suppressed. The remnants of the Munsters and the Hampshire's push up the beach having driven the Turkish infantry and MG from Sedd ul Bahr fort |
 |
| The suppression among the Turkish infantry below Fort No. 1 up, and they eventually break and start to drift away. |
 |
| One last push to the trenches, boys! |

 |
| Despite a stubborn defense, finally the pressure is too much on the Turks and they abandon their trench-line. |
 |
| We've done it boys! |
 |
| V-Beach after the landing - a costly piece of real estate. |