Showing posts with label DBA-RRR. Show all posts

Wednesday 12 September 2012

Rupert routed in Wick Field, 12 Oct 1642

This year I'm repeating the ECW early war campaign I tested last year with the aim of fighting the battled on the actual days. Tonight it was Powick Bridge.

This year I tinkered a little more with the terrain to ensure Colonel Sandys' cavalry regiment had to fight its way down the lane leading Wick Field under fire from Rupert's dragoons behind the hedgerows, while providing some opportunity for Wick Field to come into play a bit more.

Deployment: with the Parliamentary force in the foreground
Rupert, deployed his dragoons in the wood along the lane, while his shot and main force of cavaliers remained in Wick Field. Parliament moved first and was obliged to move down the lane a full movement allowance in this turn.
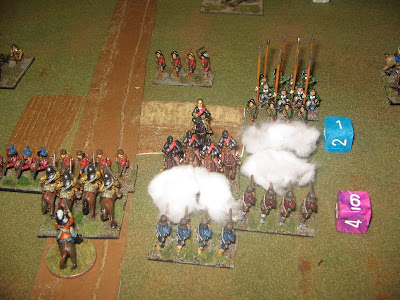
Position about three turns into the game viewed from Royalist position.
All through the game Rupert's force suffered command issues (no Pips!) giving Parliament the initiative. This allowed Sandys' Regiment to charge down the lane while their dragoons cleared the woods - destroying Rupert's dragoons in the process.

A melee raged back and forth at the entrance to Wick Field but neither side could gain advantage.
Final dispositions on 12th October 1642

The break down in command among the Royalist forces (due to a lack of pips) resulted in teh second loss with Rupert's commanded shot getting caught out in the field on their left - having incautiously ventured out from the safety of the hedgerows - and was ridden down by cavalry and shot on Parliament's right. Rupert, sensing the day was lost, withdrew to Worcester to count the cost.

The Royalists lost one unit of shot and one of dragoons - Parliament had no losses. Replacements were rolled for by the Royalists (4, 5 or 6 on a D6 meaning a unit was replaced before the next battle) with the shot unable to be replaced but the dragoons were successfully reinforced. This will leave the king with only 11 elements at the next battle.

On to Edgehill!


Friday 11 May 2012

Grumpy Portuguese Colonials

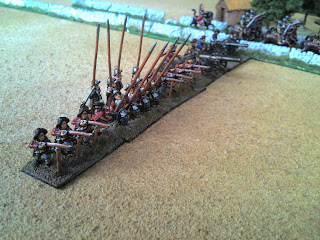
My Grumpy Miniatures Colonial Portuguese DBA-RRR army is largely complete, at last! The list is based on a foot general with options of up to 11 shot, 3 blades, and 2 skirmishers currently. I've tried to give them a fairly ragged look and selected figures that reflect the volley and charge tactics common to the Portuguese.

The Grumpy sculpts are good in general (perhaps lacking a little variation) but my main complaint is a lack of definition in the bodies especially where bandoleers, baldrics and other straps and belts intersect over a padded jack - it proved hard to paint (at least when using my rather impatient style of painting!).


The next challenge is the Vereenigde Oost-Indische Compagnie (VOC) - again using Grumpy Miniatures. However, for the Dutch I have selected figures among the Grumpy range that suggest a well-supplied, more ordered look with most wearing morions. I'm not sure if such a clear variation is historically accurate, but it suits my ideas of how these competing colonial forces should look. After the VOC, its on to Indonesian/Malay armies to give these guys someone to fight (apart from each other).

I'm still battling with finding a suitable artillery piece for both Portuguese and VOC armies - I'd like to use some naval ordnance either in hastily constructed fortifications or being hauled using some makeshift method. Not east to find in 15mm.

Camps and BUAs are still very much in the conceptual stage.


Monday 16 April 2012

Parliament routed at Turnham Green!

Much alarm has struck the people of London with the news that the parliamentary army under Lord Essex that marched out from Chelsea Field to meet the King's army this very morning, has met with terrible defeat in a battle at Turnham Green in Middlesex. Early accounts of the battle suggest great loss of life among the Parliamentarian force, the remnants of which are currently flooding back into London.

Historically, the stand-off between the two armies at Turnham Green was at best a stalemate for Charles, and probably is better characterised as a defeat. After avoiding an engagement at Turnham Green:
Charles (once more contrary to Rupert's advice) retreated back up the Thames Valley towards Oxford (losing the possible chance for a flanking movement through loyal Kent), where Charles set up his headquarters for the rest of the war. Never again during the Civil War would the Royalists come as close to capturing London and without London they could not win the war. (http://en.wikipedia.org/wiki/Battle_of_Turnham_Green)
However, in this last battle of this 1642 DBA-RRR campaign, Rupert's initiative and determination to press home his successes in the Thames Valley effected quite a different outcome. The battle opens with the two armies arrayed in the common form in the 17th century – foot to the centre and cavalry on the flanks – in the open space formed by Turnham Green, Acton Green and Chiswick common field.


With the end of the campaigning season approaching, the fields of Middlesex were wet and Charles' army, under the commend of the Earl of Forth, stood amongst the enclosures near Sutton court, with boggy ground to its rear. Essex drew up his army between the Great West Road and Chiswick Village, his troops taking what cover they could from the enclosures around Home Field.
The Royalists (foreground) deploy on Turnham Green
For some time the armies stood firm in the still morning air, eyeing off the deployment of their foes. The Parliamentarian force was content to sit in its defensive posture with its commanders satisfied with blocking the King's advance on London. Charles, however, saw the opportunity to strike a decisive blow against Parliament paving the way for an advance among the loyal Kentishmen to London's south. Buoyed by Rupert's victory at Brentford the day before, the King's ordered his commanders to press forward. The calm was shattered by the barking of orders by sergeants and the roll of drums as the Royalist line advanced onto Turnham Green.
As the foot advanced in the centre, the Royalist cavaliers swept out along the road to London threatening the lesser force of cavalry on the Parliamentarian right flank. Seeking to seize back some of the initiative, Essex ordered a general advance out of his defensive positions onto the Green. Essex's cavalry formed a line to meet the advancing cavaliers and his shot, which outnumbered their Royalist opponents, wheeled menacingly towards the Royalist right. Rupert ordered his dragoons out wide to reduce the risk of the artillery at Chiswick House being flanked.

Essex and his heavy cavalry rode furiously to stiffen the resolve of his cavalry as the cavaliers formed a line of battle that would soon overlap the parliamentary right flank. The drumming of hooves mixed with a thunderous cannonade as both Essex's and Charles' foot marched within range of their opposing guns. Charles ordered his foot to wheel to meet Essex's shot on his right and close to musket range.
 The resolute charge by Charles' cavaliers broke and scattered the cavalry on the Essex's extreme right and pushed back the others leaving the commander's Lifegaurd of heavy cavalry surrounded and hard pressed. Essex ordered his Lifegaurd to withdraw fearing they would be surrounded. Meanwhile the Royalist foot in the centre was kept from closing by the furious cannonade. Charles ordered his heavy cavalry into the centre with orders to silence the Parliamentarian guns.

With his right flank collapsing Essex ordered his foot to push hard on the left. Parliament's shot advanced into musket range engaging the Royalist foot and artillery outside Chiswick House hoping to turn the tide with their greater numbers. Musketry clattered as both lines gave fire. Smoke bit at the eyes of the musketeers and lead tore at flesh. Despte their resolute advance Essex's foot faltered with an entire regiment decimated in the centre of their line. The Royalist dragoons rode in at bit at the heels of the Parliamentarians as they fell back in disorder.

The cavaliers on the King's left flank continued to press hard seeking to surround and destroy Essex's Lifegaurd. But this was not without cost as Parliament's heavy cavalry stood firm and shattered a charge to their front, decimating a cavalry regiment. With the initiative firmly with the King, the collapse in command among Essex's forces left the artillery in the centre at the mercy of the King's heavy cavalry as the heavy foot fell to the push of pike. Amidst the chaos in the Parliamentarian ranks, Essex's Lifegaurd were surrounded by a final charge of the King's cavaliers. Despite repeated countercharges with their pistols spewing fire and lead, they were annihilated (note the 6-6 close combat roll!). Essex, now commanding the last regiment of calvary on the field, held his ground protecting the flank of the Parliamentarian foot from utter destruction as it fell back in disorder and finally routed from the field.
 Charle's army had decisively defeated Essex (1:4 elements lost) and with the campaigning season almost at an end, decided to march his army south with the aim of overwintering among rich countryside of Kent to reinforce and reequip his troops for the final push on London in the Spring of 1643.

Here ends this DBA-RRR 1642 mini-campaign. While the outcome at Turnham Green would suggest a decisive Royalist victory, the victory conditions should be consulted to reassure the reader of this result.

Thursday 12 January 2012

Work on the Dutch–Portuguese war (1602–1663) begins

My last Colonial project (Egypt 1882) is languishing, but out of the blue has come something new! I've been looking at the Grumpy Miniatures Colonial Portuguese for some time. I really like the stripped-down look of these Europeans fighting at the ends of the earth (if you have a Eurocentric worldview). So finally I've realised I can indulge my growing passion for the 80- and 30-years wars with a bit of a local flavour (being an antipodean).

The Dutch-Portuguese war largely consisted of the Dutch looking to take over Portuguese possessions in Americas, Africa, India and the Far East. Given the Dutch armies seem to be better-equipt versions of the Portuguese (although the Dutch seem to have pike where the Portuguese do not), I can use the same figures and supplement both armies with suitable 'native' allies / slaves. Seeing Botswanafury's great Dutch Vereenigde Oost-Indische Compagnie on Fanaticus recently has only strengthened my resolve.

So, [drumroll please] here are the humble beginnings of my Colonial Portuguese army for DBA-RRR.
Colonial Portuguese general and skirmishers (powder pot throwers) for my DBA-RRR army

I have gone to town with the basing a bit drawing on anything I had to hand that gave it a bit more of a lush, Far East feeling long grass needs a trim). In fact, the whole project challenges my Eurocentric approach to collecting wargaming armies so I need to work out how to do tropical bases and terrain. Ahhh ... new horizons.

PS: Thinking back now, I realise the seeds of this project were sown when I was involved in a pike and musket display for the arrival of the replica of the Batavia when it came to Sydney.
The Pike and Musket Society in action at the Batavia exhibition (source)


Friday 2 December 2011

Edgehill, Sunday, 23 October 1642

One month after the opening skirmish at Powick Bridge, King Charles' army found itself facing a Parliamentarian army under Robert Devereux, the 3rd Earl of Essex, in Warwickshire. Charles had deployed his force on the escarpment of Edgehill, blocking Essex's march into Oxfordshire to relieve Banbury.

Origin: Beesley, 1841, History of Banbury
reproduced at http://www.battlefieldstrust.com/


Essex deployed among the hedgerows and fields of the Vale of the Red Horse, below Edgehill, taking advantage of the cover to protect both flanks. The Parliamentarians stood firm in their defensive posture through that fateful Autumn morning encouraging the King to march his men down onto the flats to force an engagement. The simple farming folk of Radway abandoned their fields that day, choosing rather to seek what shelter and comfort they could find ... be it Inn or Kirk!

Charles I holds a council of war on the eve of the battle of Edgehill
By Charles Landseer, 1799-1879
Here begins the second encounter of this DBA-RRR 1642 mini campaign (and here we depart from the historical record!).

The Parliamentarian foot outnumbered their Royalist counterparts and were better disciplined and well led. Charles knew his best hope lay in breaking Essex's line with a spirited charge of his cavaliers. After the Parliamentarian victory at the skirmish at Powick Bridge, Prince Rupert of the Rhine had his reputation to recover. Rupert's loss of mounted troops at Powick Bridge had been double that of the Parliamentarians and he had only managed to recover half of that number in the month that followed (thus the King deploys 11 elements). Parliament, however, came to Edgehill at full strength (12 elements). Unlike his historical counterpart, this time Charles decides not to spend the morning on the escarpment awaiting Essex's attack, but marches down early into the fields of the Vale to take advantage of the hedges and enclosed fields to protect his flanks.

Deployment: The King's army arrayed for battle in the foreground

Charles deployed with his dragoons (x1) on his left, a block of foot (2 x pike, 3 x shot) in this centre and the full weight of his mounted troops under Rupert's command on the right (4 x Knight). The King deployed in reserve with his lifeguard (1 x pistols). Essex deployed to the Parliamentarian right with his artillery (1 x cannon) flanked by his cavalry (1 x Cv) and pistols (1 x Pi). In the centre was a block of foot (2 x pike, 2 x shot) with a column of shot (3 x Sh) and cavalry to the rear.

Rupert seizes the initiative on the Royalist right
As the foot of both armies cautiously formed lines of battle, Prince Rupert sought to gain the initiative with an daring charge on the unprotected Parliamentarian left flank. Essex ordered up his cavalry reserve to secure his left while advancing his shot and artillery on his right. Essex's tercio in the centre stood firm behind the ploughed fields to their front (bad going, in this game). 


Essex's cavalry arrived in time to secure his left and as the King's cavaliers thundered over the field towards the Parliamentarian left. The centre wheeled to threaten Rupert's left flank. As Charles ordered his pistols forward to counter this threat, a sound like rolling thunder informed him that Essex's gunners have found their first targets among the straggling foot on the Royalist left. Rupert's troopers charged into contact as the first salvo from the Parliamentarian musketeers finds its mark.

The opening shots
Rupert orders his troopers to expand their line to contact the Parliamentarian foot and cavalry to the right of the ploughed fields. The lines collide with a sickening crash of flesh and steel, and despite their momentum, the cavaliers can't shake the Parliamentarian tercio. The pike deployed in depth in the centre obliterate the hapless left of Rupert's line, and, with muskets clubbed, the musketeers fight off the determined charge. Essex's cavalry also recoil their attackers on their far left but in the centre the cavaliers strike deep, sweeping away an entire regiment and exploiting the gap in Essex's line. 


The fresh Parliamentarian shot advance through the ploughed fields threatening to overpower the weakened Royalist left and Essex leads his pistols up the road in the centre trying to regain the initiative. On the right, Rupert's flank is in disarray, but by no means beaten.


As the Parliamentarian centre advances, Essex is forced to order the shot on his left to fall back behind the pike block to protect its rear from the reforming Royalist horse. Observing this weakening of the defensive posture in the centre, Rupert orders his troopers to ride down the shot, and they are swept away while the remaining cavaliers converge on the now isolated troopers on the Parliamentarian left.


Essex's left flank collapses and sensing the immanence of his defeat, he leads a desperate charge in the centre supported by his musketeers, hoping to break the Royalist line at its weakest point. Musketry thunders across the Vale of the Horse, flesh feels the terrible bite of hot lead, and eyes on both sides stream from this burning devils breath.


Charles leads his lifeguard into the fray to allay the threat in his centre – the pistols of his heavy cavalry discharge in the faces of the of Parliamentarian musketeers who have hastily formed ranks the ploughed field ... despite this onslaught, they hold! At that very moment, Essex is leading his own desperate charge hoping to sweep away the musketeers on the Royalist centre left. As his cuirassiers pound in, Charles' musketeers give fire and give Essex's men some hot stuffe ...


Charles' musketeers found their mark and obliterated their Parliamentarian counterparts on Essex's left. Essex found himself dangerously exposed by the utter destruction of his left flank. Fully one third of his men lay smashed and bleeding on the fields beneath Edgehill. The resolve of his men was broken and they fell back in disorder. 

Likewise, King Charles' men, few of them having tasted battle before, showed little taste for further slaughter and withdrew to count the cost of this first serious engagement of the Civil War. It would be a cold night for the survivors and wounded of both armies, left to find what shelter and help they could, with empty stomaches turned by the experience of death at close quarters.

"No man nor horse got any meat that night and I had touched none since the Saturday before ... neither could I find my servant who had my cloak so that having nothing to keep me warm but a suit of iron [armour] I was obliged to walk about all night which proved very cold by reason of the sharp frost."
Edmond Ludlow, Officer of Essex's Lifeguard at Edgehill*

*In, Trevor Royle, Civil War: The Wars of the Three Kingdoms 1638–1660 (Abacus, London, 2004) p. 199

Final result: 
  • Royalists lost 1 x Kn (1)
  • Parliamentarian lost 2 x Cv, 2 x Sh (4)
On to Brentford!

Monday 14 November 2011

Powick Bridge, 23 September 1642

In  what is popularly characterised as the opening 'battle' of the English Civil Wars, the battle of Powick Bridge saw about 1000 Royalist cavalry and dragoons led by Prince Rupert defeat a similar force of Parliamentarian cavalry and dragoons led by Nathaniel Fiennes. This action took place in the narrow lanes and hedged enclosures near the hamlet of Lower Wick, north of Powick Bridge, in Worcestershire.

This first encounter in an English Civil War mini campaign for DBA-RRR designed by 'Cromwell' of Fanaticus employs 6 elements a side: 4 cavalry (parliamentarians) or Knights (Royalist), one dragoons and one shot.

Linear obstacles were included using the DBACW rules (Keep it Simple Rules) for this terrain type (slightly adapted to reflect troop types in DBA-RRR).

  • Stone walls: Foot, Gun/Cannons and mounted are classed as being 'in cover' when defending a stone wall (shooters firing into cover get -1 to distance shooting. Defenders get a +1 close combat modifier when in close combat). They are classed as bad going and only foot (excluding cannon/guns) can cross stone walls and they must have sufficient movement for the entirety of the base to clear the wall in that turn (ie. cannot be left straddling the wall). Groups can only cross in one element wide columns. I play it that it must always be clear which side of the wall a unit is on - so you cannot have an element of a group straddling the fence. They are impassible terrain when it comes to outcome moves for mounted and cannons/guns. Impetuous mounted do not advance across the wall if their opponent is destroyed/recoiled/flees.
  • Hedges are counted as 'minor linear obstacles' - they count as bad going and have the same effect on movement as stone walls. Hedges provide no modifiers to distance shooting or close combat.
  • Linear obstacles block line of sight except where the shooting element has its firing edge,  and/or the target has the edge being shot at, hard up against the wall/hedge.

This adaption may have some 'bugs' still - but I/we just apply common sense to solving problems.

Beyond the initial campaign 'rules' I imposed some set-up and movement conditions in the first bound. I decided the parliamentarians should deploy on the bridge over the River Teme advancing in a column along the road (excepting the element of shot - mostly because there was not room). The Royalists deployed in the open fields (Wick field) out of direct sight of the exhausted Parliamentarian column.
The Royalists were given the opening move and then Fiennes' column was obliged to advance a full move along the road into the lanes beyond the bridge.
The action began with Rupert ordering half of his cavaliers to sweep wide on the Royalist right in the hope of catching Fiennes' column in the rear. The remainder of his mounted troops spurred on into the lane while the shot and dragoons secured the hamlet of Lower Wick. The Parliamentarian column was halted with a volley of musketry as they tramped down the lane.
Fiennes' dragoons were thrown back by the volley but they quickly took cover behind the hedges. Royalist and Parliamentarian horse faced each other at either ends of the lane awaiting the outcome of the musket duel that ensued. Meanwhile, Rupert's flanking manoeuvre continued. Fiennes' led the rear of his column out of the lanes to meet the charge.
As the fighting in the lanes reached a crescendo the cavaliers on Rupert's right wing pushed the Parliamentarian cavalry back to the banks of the Teme (which ended up as a paltry river in this game). Fiennes called more of his cavalry out of the lanes to counter this push and the impetuous cavaliers were caught in the flank with heavy losses (1 element of cavaliers (Kn) lost).
Rupert's cavaliers charge down the lane as the parliamentarian dragoons fall back in a hail of musketry.
Fiennes orders in a third troop of cavalry to support his hard pressed left flank. 
The impetuous advance of Rupert's cavaliers pushes the parliamentarian horse back into the river Teme but Fiennes  leads a decisive counter charge surrounding and decimating the Royalist left flank.
Sensing the tide of the battle was turning, Rupert led his remaining cavaliers in a thunderous charge down the lanes destroying the troop of cavalry facing them while his dragoons swept around the hamlet in a flanking manoeuvre. Rupert's decimated right fell back allowing Fiennes to send some cavalry back into the hamlet to slow the advance of the Royalist dragoons. The battle hung in the balance ... the first to destroy another element would be the victor.
At this apex of the battle, the parliamentarian foot managed to rally in the woods next to the hamlet and swept into contact with Rupert's mounted troops in the lanes. Unable to manoeuvre, the leading troop were trapped by a deadly volley of musketry at close quarters.
Alas, the dash and daring of Prince Rupert was not enough to carry the day. The Royalists fell back to lick their wounds destined to meet the parliamentarians in the first major battle of the civil wars in a little over a month at Edgehill.


Sunday 13 November 2011

1643 ... somewhere in the west country (a solo DBA encounter)

In late summer 1643, a sizeable force of Sir Ralph Hopton's army surprise Waller's Parliamentarians near a hamlet in Somerset. The Royalists quickly deploy their mounted troops to the open ground on their right wing hoping to strike while Waller's foot struggle out of ground domindated by hedges. Knowing his foot is outnumbered in the centre but certain that his left flank is securely pinned on the hamlet where his dragoons lurk, the Royalist commander quickly takes the initiative on the right and charges the Parliamentarian artillery.
View from the Royalist rear - the cavaliers charge on the right is countered by Parliament's  heavy cuirassiers
The Parliamentarian commander, seeking to buy some time while his remaining shotte deploy to reinforce his beleaguered left, leads his heavy cuirassiers in a daring charge to break the Royalist foot that have rushed in to support the cavaliers. The cavaliers try to ride down the exposed Parliamentarian left but the momentum of their charge is broken at cannon's mouth. In the centre the Royalist foot deploy their pike in depth, and the musketeers steady themselves for the maelstrom of lead that will issue from the cuirassiers wheellocks as they smash into their ranks.
The cavaliers falter as the Parliamentarian heavy cavalry countercharge
The failure of the cavaliers to drive their charge home, coupled with the heavy losses among the Royalist mounted troops from cannon and musket fire, gives the Parliamentarian shotte time to deploy. Encouraged by the arrival of the foot, the horse teams are whipped into the melee and manage to draw the heavy guns back out of danger. But, the undaunted cavaliers wheel around and slam into the flank of the muskets forcing them to turn to meet the charge. The din of battle soars as the 'lobsters' drive into the Royalist foot decimating the front ranks of pike and musket, driving all before them with their commander at the very apex of the charge. Yet, seemingly out of nowhere, remnants of the Royalist mountet troops slam into the left flank of the cuirassiers - both commanders sense the moment of decision has come. Who will carry the day?
The high water mark - remnants of the first Royalist charge strike the exposed left of the
Parliamentarians while the cavalry reserve charges to support them.
Battle rages ... the smoke of musketry blinds those engaged ... the commanders rise in their saddles ... the gods of war roll their dice ...
Bella detesta matribus! (Horace)
Wars, the horror of mothers! The lobsters shrug off the challenge to their flank and decimate the Royalist centre. While in the distance, the hard-pressed Parliamentarian musketeers are savaged by the impetuous charge of the few remaining cavaliers, the remaining foot flee. The Royalist commander rushes to plug the gap in his line ... but the day is lost (4:1).
The Royalist heavy cavalry arrive too late.

Tuesday 30 August 2011

DBA-RRR ECW – battlefield terrain

Having painted and based and fought an initial battle with my ECW army for DBA-RRR, I decided it was time to turn the paintbrush to some terrain to get that quintessential English feel to the battlefield. I have a box of resin buildings from the Hovels 15mmm Medieval range sitting around from a bygone period of affluence. Amongst them are some cracking pieces that will add atmosphere to my Civil Wars battles.
  • (6M5) Inn of half timber with thatched roof
  • (8M5) Bailiffs house, stone walls half timbered with tiled roof.
  • (3M5) Stable block in timber with thatched roof.
I have not quite decided how these buildings will fit into DBA-RRR. The could be used as a single built up area (BUA) if mounted appropriately. However, recent experience with other rules in the DBx family has got me thinking. Having played a number of games of DB ACW lately where we have used buildings scattered over the table (4' x 4') as impassible terrain features (with each building representing a hamlet or such at the scale of armies, rather than a single building).

If spaced with appropriate room for elements to move and deploy around them these buildings become very influential on the battlefield: providing shelter from artillery / musket fire; being a great feature to anchor a command's flank on; and at times as a hinderance when forming up into lines of battle. While you have to be careful not to overdo it (no more than 3-4 on a 4' x 4' table), they seem to add to the game rather than detract. Aesthetically as well as providing tactical challenges.

In the ECW context, I am thinking of introducing a similar approach as we have used in DB ACW. To that end I will experiment with the system we have used which is to do away with rules dictating the amount and placement of terrain and have the player who hosts the game set up a table with plausible terrain for an encounter and the guest (who sees the board for the first time the night we play) having the choice of which edge he/she deploys on.

A report on this approach will follow. In the mean time, here are a few pictures of the new buildings (Inn and Bailiffs house only) I took in a flood of sunlight today. Thanks for looking.


Tuesday 23 August 2011

For God, Kinge and Parliament!

I have at last completed sufficient elements to field an early English Civil Wars Royalist army for DBA-RRR. I have not gone so far as to research individual units for the colour scheme - rather I have stuck to a more generic approach to the army so far.