Saturday 7 November 2015

"A man will never need a grave dug if he is shot in this desert"

After reading Wavell's rather dry "The Palestine Campaigns" (pardon the pun), I needed to get back to some history told 'against the grain' - a personal narrative of this theatre of war.

I'm now 'enjoying' Ion Idriess' raw and gritty account of his time with the 5th Light Horse, AIF, in Gallipoli, Sinai and Palestine. A very worthwhile read to get a sense of the horrors endured by the common soldier in this theatre of war.

Having been wounded twice on the Gallipoli peninsular, Idriess find himself convalescing in Egypt. As Gallipoli had been evacuated by this time (March 1916) the 5th finds itself stationed near the old battlefield of Tel-el-Kebir (1882):

Close by is the old battlefield of Tel-el-Kebir. Remnants of buttons, bullets, bayonets and cartridge cases are littered there while yellowed skulls show where the Khamseens have blown the sand away. The scurrying winds have uncovered old bodies in an uncanny state of preservation, surely due to some chemical preservative in the sands. Several boys looked mustily young and sleeping. It was a shock to see them, so still and quiet and old. They gave me an uneasy impression that from some aloof world they were accusing me-and really I never knew they once existed. Our boys buried them deep.

A few days later, while drilling in the sand-swept desert, an officer remarked, 'A man will never need a grave dug if he is shot in this desert."

Ion Idriess, The Desert Column: Leaves from the Diary of an Australian Trooper in Gallipoli, Sinai and Palestine, Angus and Robertson Ltd, 1934, Sydney, pp. 69-71.

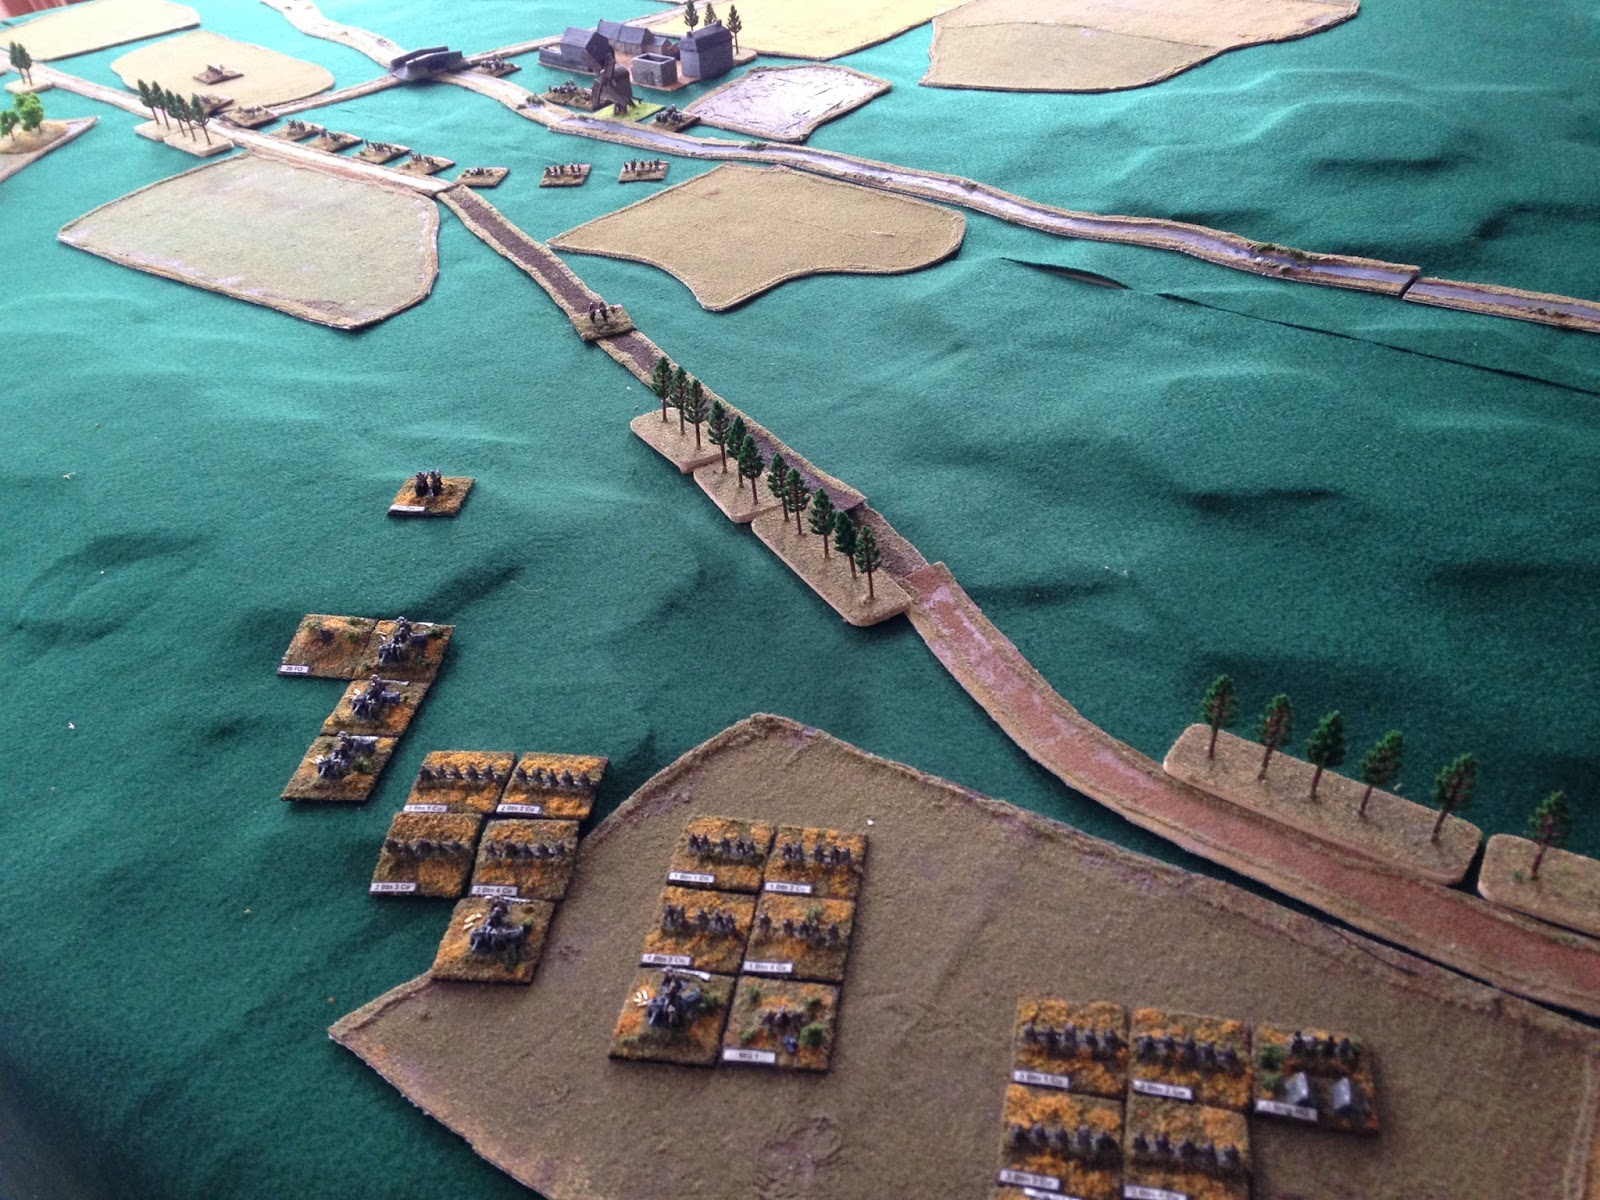
Anyway, with all this wonderful inspiration, I've managed to get my first British infantry brigade together for If the Lord Spares Us. It's nominally a brigade of the 42nd (East Lancashire) Territorial Division. Here's a few of my typically fuzzy (Sorry! Must buy a decent camera) pics:


The armoured car is from Irregular Miniatures (Improvised Armoured Car IRR-NC099) with a lewis gun from a Peter Pig 'Home Guard' (WW2) figure and the head and torso of an Eureka figure.
I cut the weapon and lower arms from the Lewis gunner, and gut away the same portion of the Eureka figure. Then I cut the legs off the Eureka guy and glued the torso with Lewis gun to the legs of the Irregular gunner. The figure seated in the back of the armoured car was cut out (drilled, actually).

Here's the result. The paint job leaves a lot to be desired - I hope to add some detail and better AFV-style weathering when I learn how to do it!


Ottoman infantry next! Thanks for dropping by.


Saturday 3 October 2015

6mm scratch-built entrenchments for Great War Spearhead II

I love an excuse to drop everything and scratch build something.

I was setting up for my second game of Great War Spearhead II (GWSH II) with the aim of playing the "A Hot Day's Work" – a tasty little introductory scenario from Robin Sutton's The Great Adventure. This provides another hypothetical rearguard action by the BEF during the Great Retreat of 1914 – this time with a few more troops on each side and the lack of a bridge over an impassable river to focus one's defence on!

I was ready to go when, on rereading the scenario background, I saw that the BEF could start the game entrenched. 'But you don't have any entrenchment markers!', I hear you say.

I've always ben rather keen on the foxholes and trench markets produced by Timecast. So, I thought I'd have a go at something similar and decided to use card bases and form the trenches using caulking compound.

Here's a quick step by step:

Add a blob of acrylic caulking compound to each 30 x 30 mm (1.1/4") square of thick card.
Wet your fingertip (stops it sticking) and smooth it out over the base. Then sprinkle a strip of flocking either side
while wet - be careful to leave the centre clean.
While the caulk was drying a little, I cut a trench-like template from a cheap plastic crate (purchased from a thrift shop - I use them for a range scratch building tasks - e.g. 28mm window frames etc.)
When the caulk is touch dry (20 minutes on a warm day) wet the template and press it into the caulk. Be sure to press each section down firmly - I used a screwdriver blade.
Gently lift out the template. You have a passable trench impression. I then went over each with a palate knife and reshaped the caulk and scratched it away down to the card on the trench floor.
They need some work work in terms of a bit of dry brushing to give the earth more texture. You could also add shell holes and other interesting detail if you are inclined.

Here they are in action (well... abandoned!). As I say, some detailing will take them the next step.
For a quick job, I feel they make a passable trench marker. The template produced a rather deep traverse between each fire bay but for a quick job, I can put up with that.

How did the game go, I hear you ask? The aim for the British was to defend the village in the centre of the board.
The German commander executed a cunning flank march and swept in on the British left.
The BEF suffered heavy losses in the woods as they rushed to establish a new defensive perimeter on their left.  British artillery had been ineffective so far and the German forward observer was having communication problems as a result of the pace of the advance (fire missions called for, never arrived).
Once both sides got into small arms range the casualties were very heavy. With the addition of some indirect fire from a regiment of the Royal Artillery and two regiments of German field guns, things got very sticky indeed. The BEF's machine guns took a heavy toll on the German infantry advancing in the open. In this turn alone, both sides suffered nearly half of the losses they experienced in the whole game!
Despite their steady advance through the woods, the German's eventually lost over half of their  troops (Morale: Regular) and failed their regimental morale check and withdrew from the field. The veteran BEF, while suffering severe losses, held  on and slowed the German advance one more.
Thanks for visiting. This blog has just passed 20,000 page view recently. I really appreciate the interest you all show in On Senlac Hill. A particular thanks to my followers and those who comment too!

Wednesday 30 September 2015

GWSH II - Rolling with the punches, France, August 1914

I am pleased to report that my 6mm Great War project that I started back in July 2014, has finally got off the blocks. After months of (occasional) painting and gathering terrain, I finally played my first game of  Great War Spearhead II last weekend.

I thought it best to start with a simple scenario so I chose Rolling with the Punches - one of Robin Sutton's excellent GWSH II introductory scenarios from his Great Adventure site. This scenario has a small BEF force seeking to delay a German advanced guard during the Great Retreat of August and September 1914.
This gave me the first opportunity to try out my MDF hex terrain. This is a no frills version of the very effective method of using Hexon terrain to build up contours under a terrain mat employed by Robert Dunlop. Alas shipping Hexon terrain to the Antipodes costs more in postage than it cost me to buy this magnificent collection (and you see only a portion of it here) of hand cut (!!!) MDF hexes. I obtained these as a bit of a one off from a local supplier (thanks Mike!). Not that the postage cost is the fault of Kallistra, just a fact of geography!
Hills are laid out in preparation for the felt cloth

I ironed around the hills to improve definition of the contours through the felt.
The aim of this scenario is for this detachment of the British Expeditionary Force (BEF) to hold the bridge for 6 turns to allow the remaining elements (not depicted) of the BEF to secure a defensive position further south. I was playing solo so to add a level of surprise, I set up he BEF and provided four possible lines of attack for the Germans all of which culminated at the bridge.
The Germans took the initiative but drew the furthest entry point from the bridge. They approach in a series of columns while the BEF defends a perimeter in front of the bridge. British artillery lined the far side of the river near the village and their HQ.
The BEF were under 'defend' orders so had to sight the Germans before they could adjust their deployment.  
German infantry are sighted as they advance up the valley. The German commander orders a regiment of  77mm field guns to deploy on the nearby hill (middle left)
On a tight schedule, the Germans surge forward into small arms range.
Small arms fire takes its toll on the German left while a battery of British 18 pdrs open fire. 

Finally, German field gun regiment lays down a barrage on the British centre hoping to punch a hole through which the advance can continue. Despite the fury of the barrage, the Old Contemptibles stood their ground. At this stage I realised the 6 turns given to the Germans was unrealistic given their distant entry point and decided to extend the time
available to 8 turns.

As the volume of fire increased, companies of infantry were being mown down (destroyed companies marked with white skulls on red bases) on both sides and  those remaining troops were largely suppressed (white skull)


Turn 8: The German advance has stalled. The BEF have paid a heavy price but the order is given to fall back as the main body is now well on its way to the next defensive position. The BEF live to fight another day.
I really enjoyed this first touch of the GWSH II rules. I'm sure I made many mistakes but time and rereading in the light of this experience will sort that out.

I know I've got a long way to go towards learning the intricacies of industrial warfare. The overwhelming feeling from this game was that of blundering into contact, with the Germans driven to accept heavy losses to keep to their tight timetable. Not unlike the events of 1914!